Sewn face mask for youth
Updated 05.18.20 at 18:13 PST
If you live in the Seattle area, both sizes of youth sewn masks are available for free – just make your request and pick them up while supplies last. Fill out the order form for the complete sewn mask here.
We are making youth sewn masks with fabric ties out of surgical fabric. This face mask was designed by local sewer extraordinaire Jeni Falldine.
Disclaimer: These do not meet the medical standards for surgery, and are meant to be the best solution with off-the-shelf materials to create an effective viral barrier.
To make your own, follow instructions below.
Supplies
- Sewing machine
- Scissors
- Pins
- Surgical tool fabric (this fabric doesn’t unravel so it’s easier to finish the edges)
Assembly
Step 1. 1. Cut one rectangle and two strips for ties according to the size of the mask you want to make – either youth small (Image 1a) or youth large (1b)
Youth small (Image 1a):
- Cut: (1) Rectangle 5 1/2” x 12 1/2”
- Cut: (2) 1″ x 48″ tie strips (Image 1a)
- Finished size (after pleats): 5 1/2″ wide x 3″ – 3 1/4″ tall
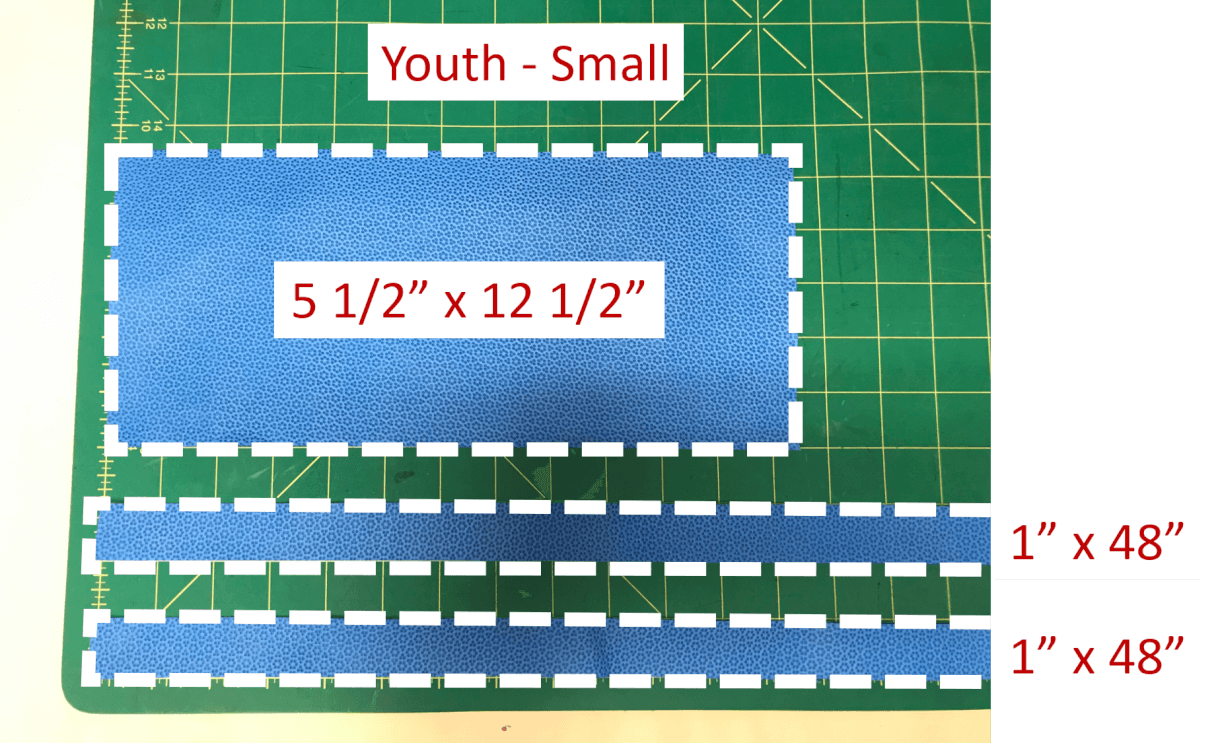
Image 1a – size of surgical fabric pieces for small youth mask. Note that the 1″ x 48″ tie strips extend outside the frame of the picture.
Youth large (Image 1b):
- Cut: (1) Rectangle 7” x 13 1/2”
- Cut: (2) 1″ x 48″ tie strips (Image 1b)
- Finished size (after pleats): 6 1/2″ wide x 3 1/2″ – 4″ tall

Image 1b – size of surgical fabric pieces for large youth mask. Note that the 1″ x 48″ tie strips extend outside the frame of the picture.
Step 2. Fold rectangle in half, short ends together, so that good printed (outside) side of your fabric is inside and the bad side of your fabric is showing (Image 2).
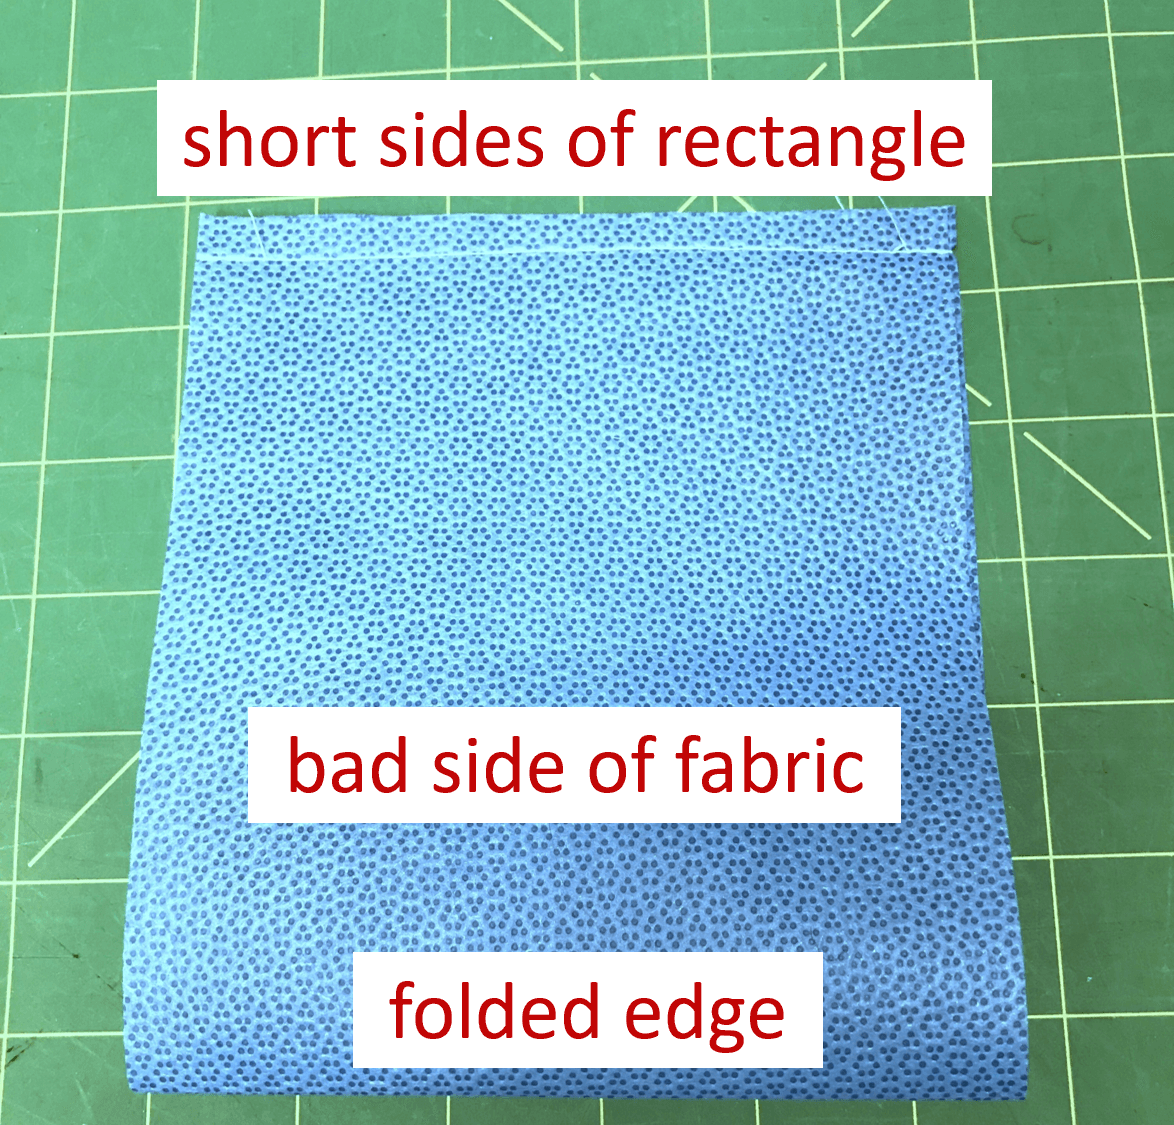
Image 2: Fold rectangle so short sides are together and the bad side of fabric is visible.
Step 3. Sew the two short ends at the top together with a 1/4″ seam allowance, back-tacking at either end (Image 3).
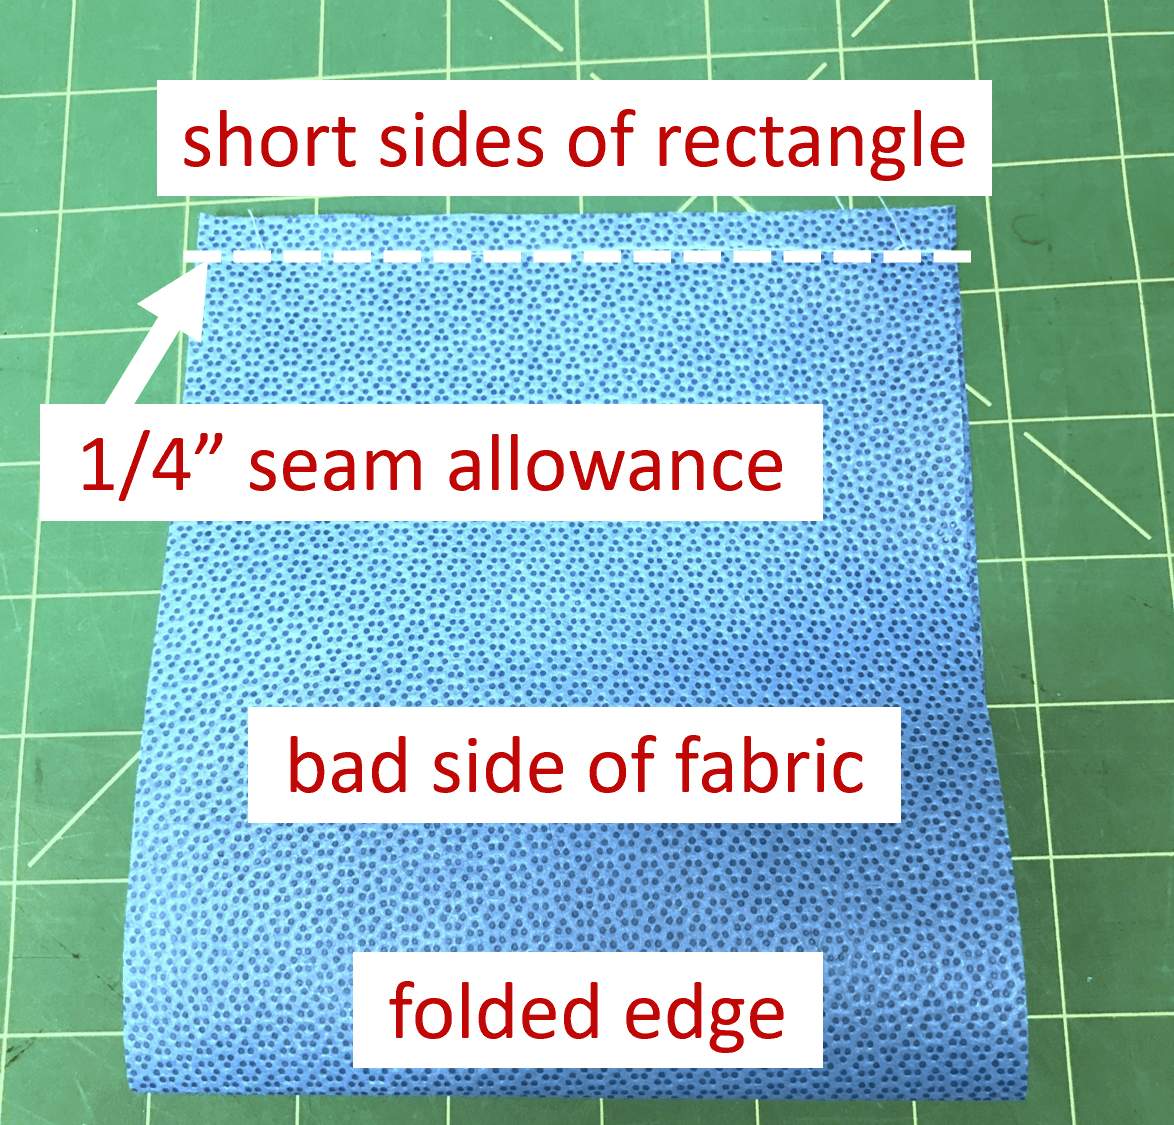
Image 3. Sew short sides together with 1/4″ seam allowance.
Step 4. Turn mask right side out (Image 4). The good side of the fabric is now visible.
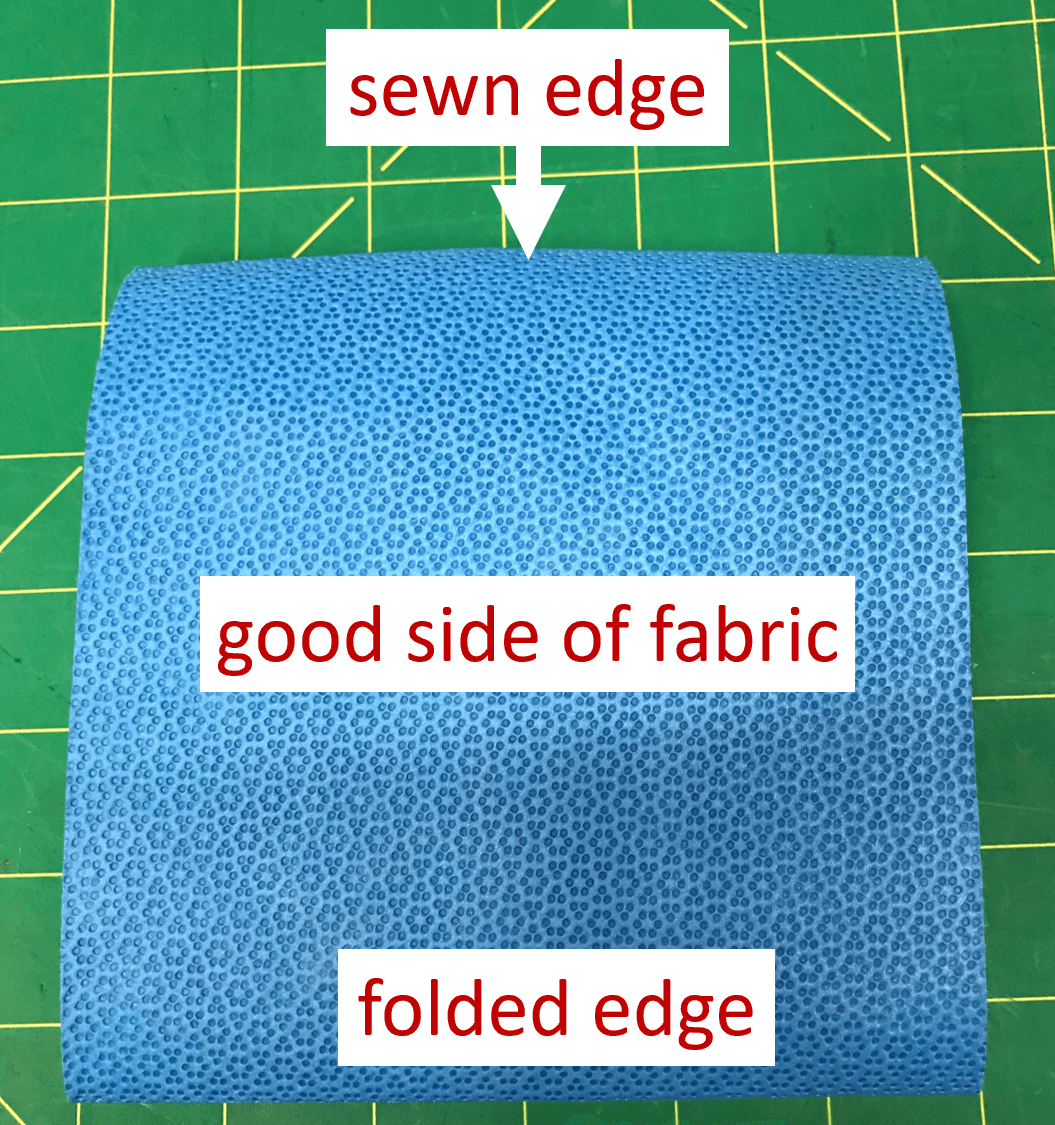
Image 4. Turn the mask good-side out.
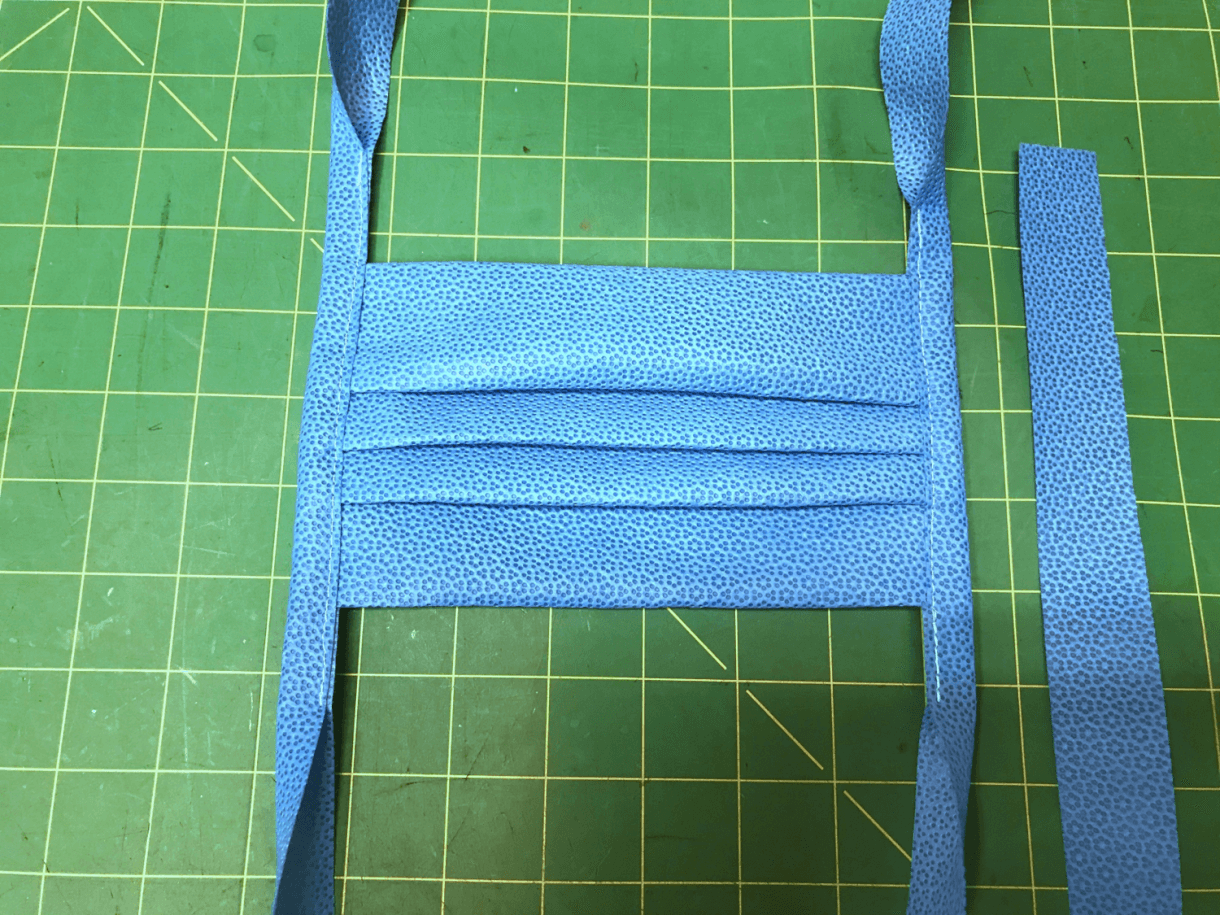
Step 5. Add three pleats, each 1/4″ – 1/2″ deep, centered in the middle of the mask. These pleats don’t have to be perfect – just aim to get the finished height of the mask in the correct size range. Finished height for youth small = 3 1/4″ tall; for youth large = 3 1/2″ – 4″ tall. Pin pleats into place (Image 5).
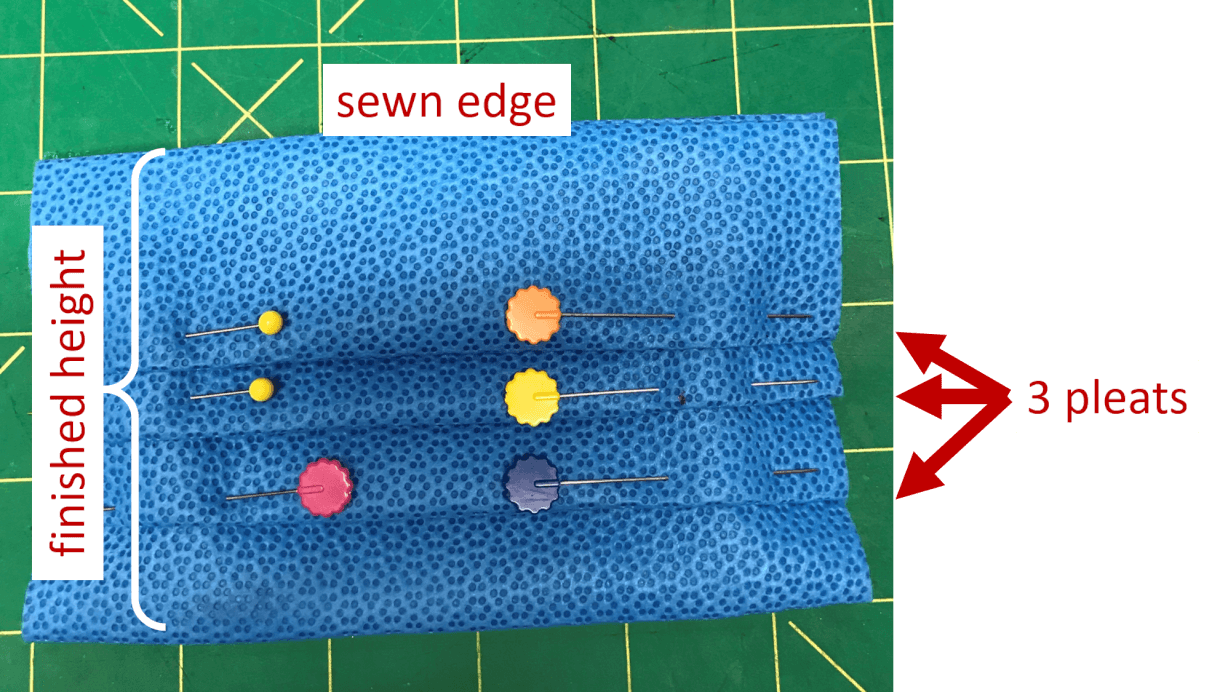
Image 5: Create 3 pleats each 1/4″ – 1/2″ deep so that the finished height is within the range indicated in Step 5. Pin pleats in place.
Step 6. Sew sides together at around 1/8″ from edge, sewing the pleats into place (Image 6).
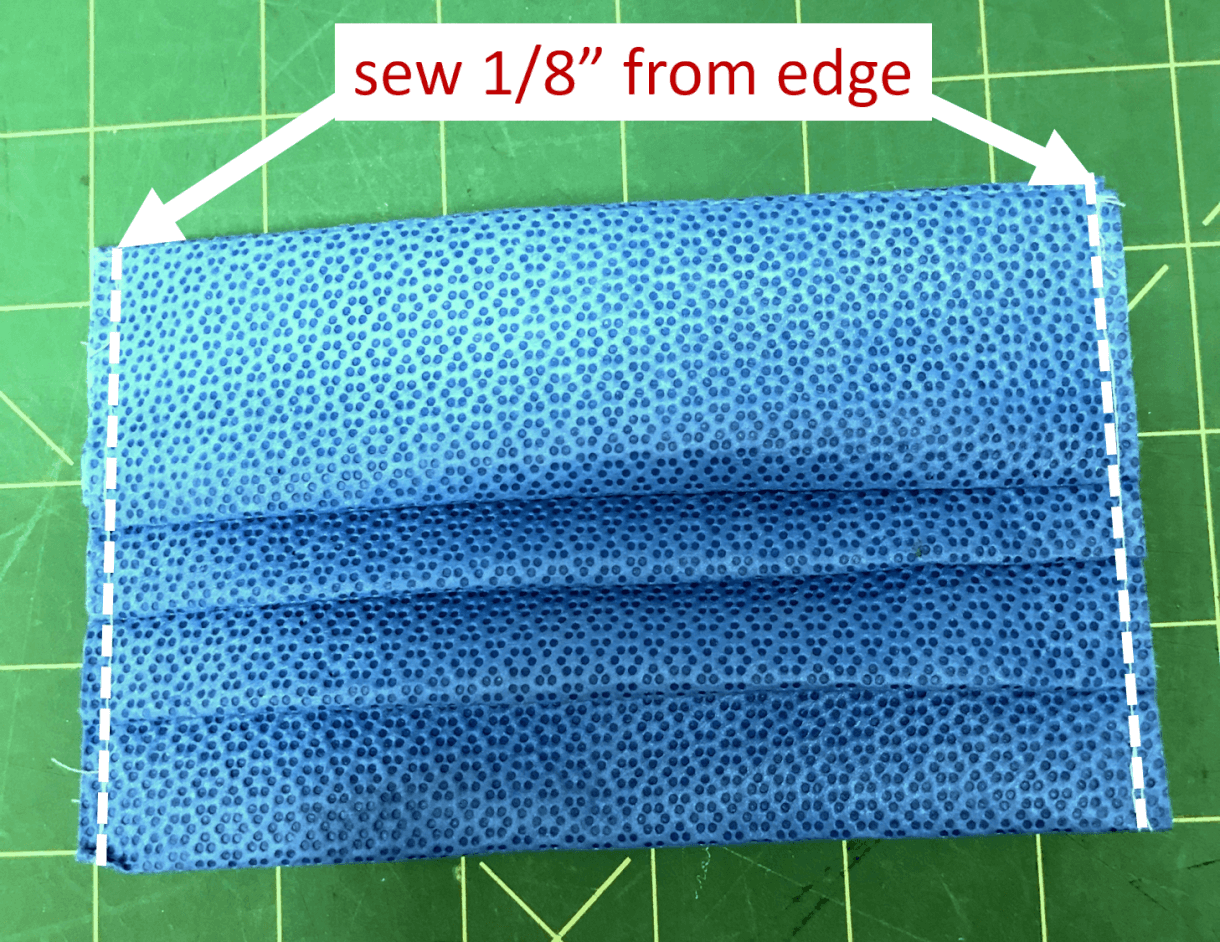
Image 6: Sew pleats in place 1/8″ from each edge.
Step 7. Find the middle of your tie strip (equal distance from each length), and pin it to the middle of the side of your mask, folding in half around the unfinished edge of the mask (Image 7).
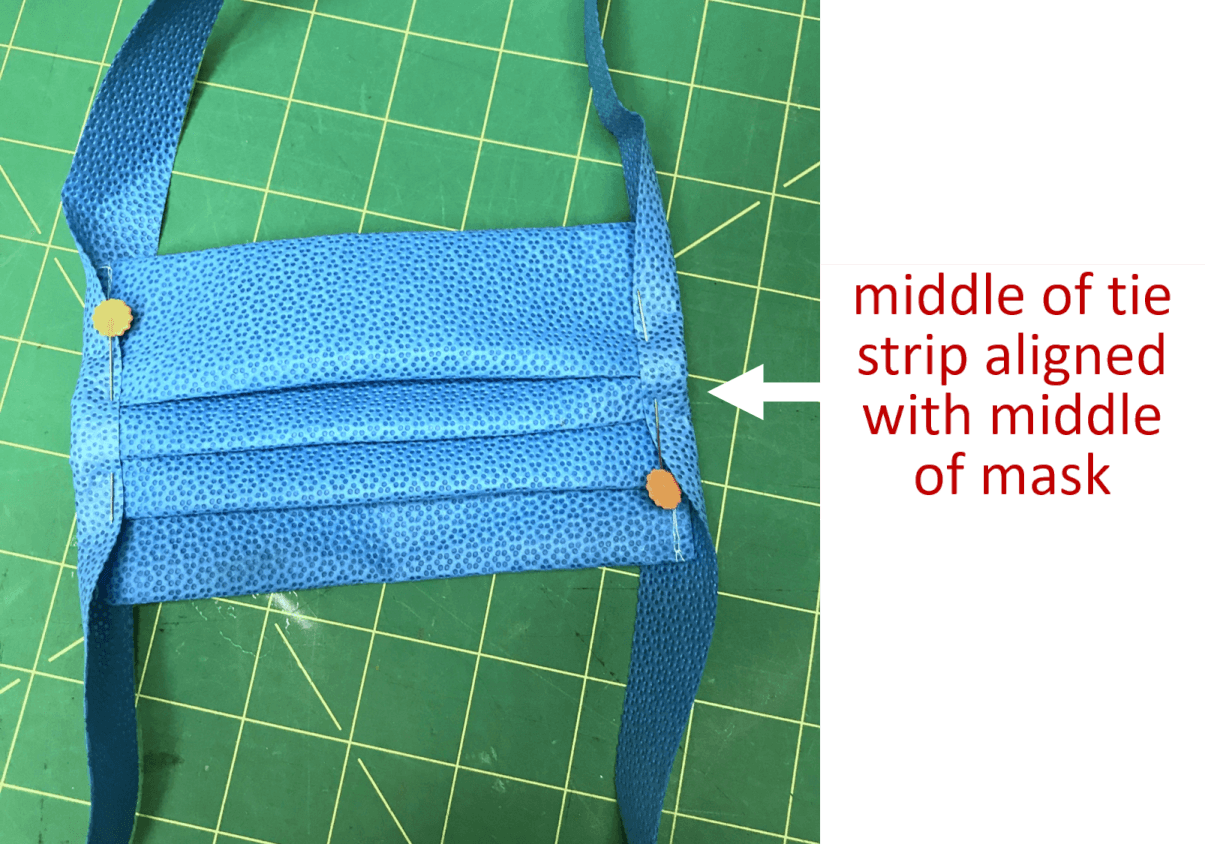
Image 7: Line up the center of your tie strips with the center of the sides of each mask. Fold each in half around the side of the mask and pin in place.
Step 8. Sew the tape to the mask, around 1/8″ from the raw edge. Start and end with a back-tack 1″ – 1 1/2″ above and below the mask (Image 8).
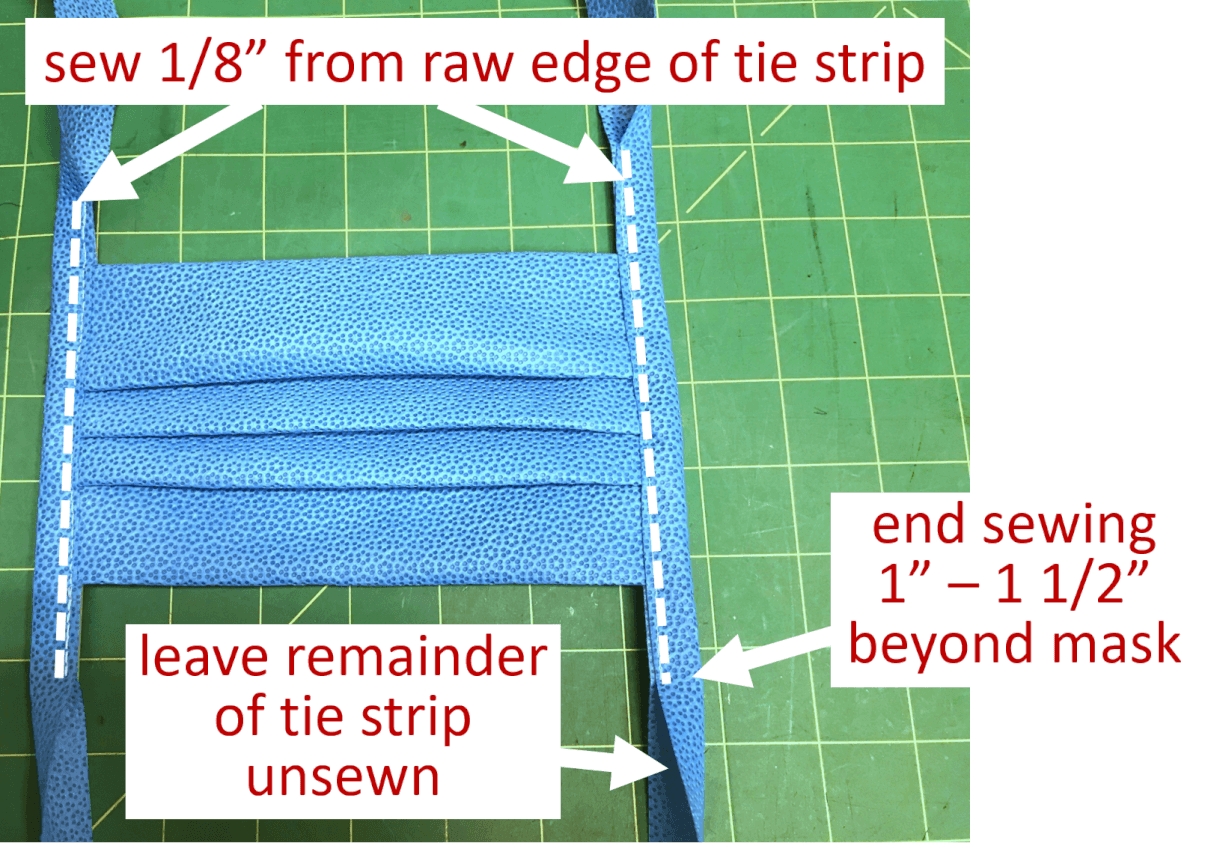
Image 8. Sew the tie strips in place, ending 1″ – 1 1/2″ beyond the top and bottom edge of each side.
Congratulations, your mask is finished! Hold the mask over your mouth and nose, and tie the top ends of the tie straps around your head and the bottom ends of the tie straps around your neck. You’re good to go!